


Use Wall display for a dedicated household screen. It applies a coordinated set of settings instead of requiring each option to be changed separately.
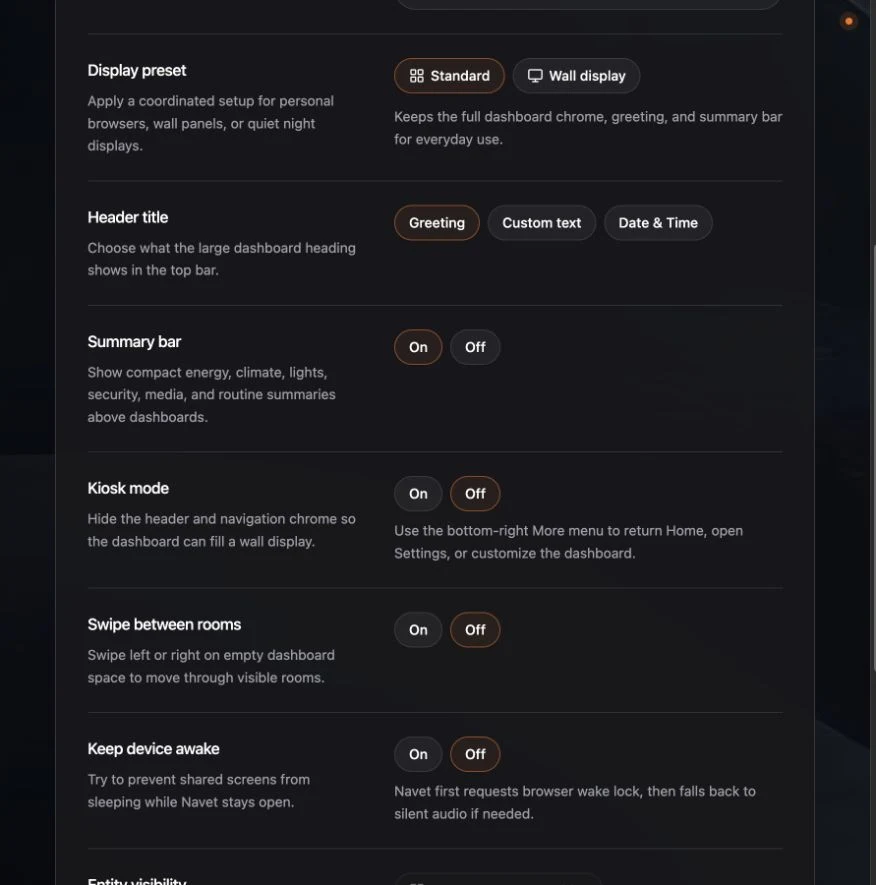
Apply the preset
- Open Settings → Display & controls on the display.
- Under Display preset, choose Wall display.
The preset enables:
- Kiosk mode.
- Keep-awake.
- A clock header.
- A denser layout.
- The Home summary bar.
The preset applies to the current device. To reuse the same display behavior elsewhere, use Settings → Display & controls → Device settings to copy it once or link a group of screens.
Use Navet in kiosk mode
Kiosk mode hides the normal Navet header and sidebar. Use the bottom-right More button to open Kiosk control.
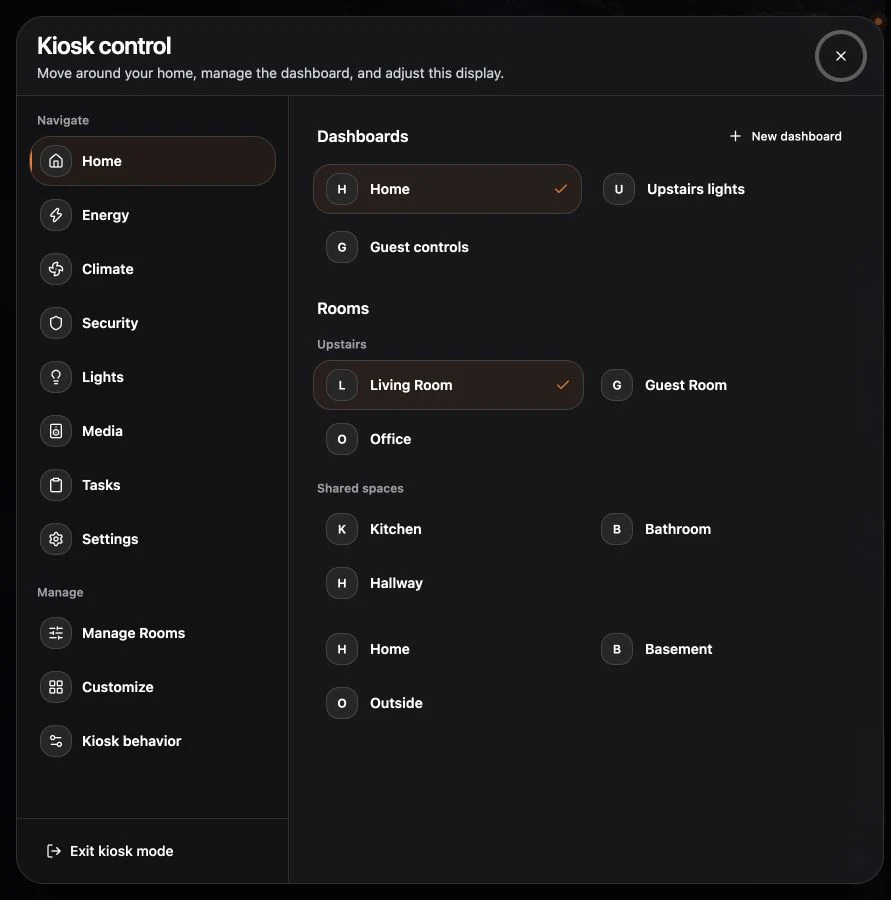
Kiosk control provides:
- Dashboards, sections, and room navigation.
- Settings and room management.
- Dashboard and sidebar customization.
- Kiosk behavior, including swipe navigation.
- A direct Exit kiosk mode action.
Open Kiosk behavior to enable Swipe between rooms. Swipes work on empty dashboard space so they do not replace normal card gestures.
Home Assistant header and sidebar
Navet kiosk mode controls Navet’s own chrome. In Home Assistant-hosted modes, hiding Home Assistant’s surrounding header and sidebar also requires the optional shell module described in the Home Assistant installation guide.
Leave kiosk mode
- Open Kiosk control from the bottom-right More button.
- Choose Exit kiosk mode.
You can also open Settings → Display & controls and choose the Standard display preset.
Keep this recovery path available before mounting a tablet where browser controls are difficult to reach.
If the display sleeps
Check the keep-awake status and follow Recover kiosk access and keep-awake.